OEM Customized wholesale melamine bowl with handle Wholesale to Angola
OEM Customized wholesale melamine bowl with handle Wholesale to Angola Detail:
| Specification | |
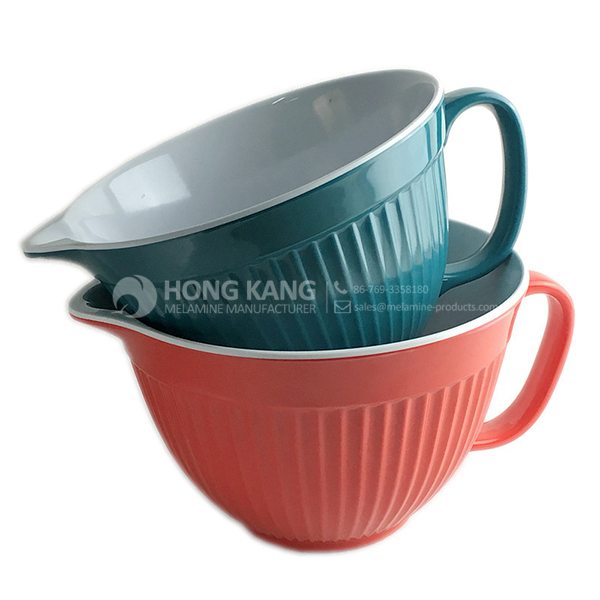
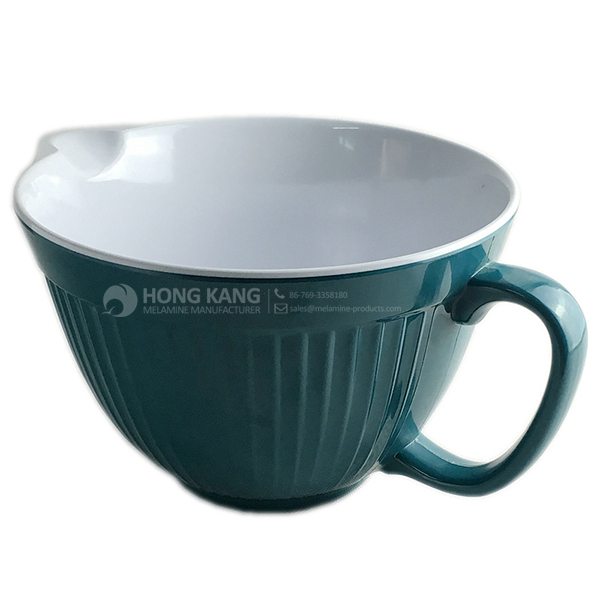
| Item Name | 8inch Two Tone Melamine Bowl with handle |
| Item No. | BW270 |
| Shape | Round with handle |
| Body Color | Blue |
| Decal Color | 4 colors print (if need) |
| Finish | Glossy |
| Style | Fashion |
| Motif Design | Customized |
| Shape Design | OEM/ODM |
| Test Standard | FDA,PROP 65,EN71,LFGB etc. by SGS or ITS |
| Packaging | 4pcs/box,12pcs/carton |
| Dimensions | |
| Length | 20.5 cm |
| Width | 26.5 cm |
| Height | 13.5 cm |
| Capacity | N/A |
| Material | |
| Body Material | 100%melamine |
| Decal Material (if need) | 4 colors print (CMYK), or spot color printing, RoHS certificate |
| Imprint (if need) | Seiko ink type 1000 or other type, RoHS certificate |
| Accessories Information | |
| Lid included | No |
| Other | with anti-slip bottom rubber |
| Weights | |
| Net Weight (kg) | 8 |
| Shipping Weight (kg) | 9.2 |
Product detail pictures:
Related Product Guide:
Benefits of Melamine Dinnerware
Affordable Types of Dinnerware Sets
We usually keep on with the principle "Quality To start with, Prestige Supreme". We've been fully committed to offering our purchasers with competitively priced excellent solutions, prompt delivery and skilled support for OEM Customized wholesale melamine bowl with handle Wholesale to Angola, The product will supply to all over the world, such as: Hamburg , Spain , Sheffield , It is our customers' satisfaction over our products and services that always inspires us to do better in this business. We build mutually beneficial relationship with our clients by giving them large selection of premium car parts at marked down prices. We offer wholesale prices on all our quality parts so you are guaranteed greater savings.
FAQ: 1.Q: Where is your factory located? How can I visit there? A: Our factory is located in Guangdong province, China. Warmly welcome to visit us! 2.Q: What is the material of your products? A: The material is melamine. 3.Q: How can I get some samples? A: We can send the samples by Express/DHL/FedEx/UPS etc. 4.Q: How does your company do regarding quality control? A: We have a very strict QC system. Our inspectors have been closely monitoring the production process from the selection of raw materials to the final step of the finished products. 5.Q: Can you print our logo on the product & packing? A: Yes, We can print your logo on our products. 
| * Do Not Touch On Fire Directly | |
|---|---|
| * Do Not Washing By Steelwire Ball | |
| * Non-Microwave Ovens | |
| * Dishwasher Safe |
Now chatting: http://www.leawaysschool.com/solution.html
Contact Us: http://www.leawaysschool.com
Dinnerware – Plates, Bowls & Sets
World Market Brows our affordable Dinnerware Sets, including Plates & Bowls. Nutcracker Ceramic Dinnerware Kid's Christmas Melamine Plates Set of 6 .. your kitchen and dining room with the style of your choice, from bohemian to ultra-modern, Wow your guests by serving small bites and sauces with our sensational square, Asian Dinnerware Sets
World Market You'll love our affordable Asian Dinnerware Sets from around the world. Black and Red Melamine Sauce Dishes Set of 6 Floral Border Serving Bowl Dotted Porcelain Sake Cups, Set of 4 We have an array of styles in wood and ceramic, as well as easy-to-hold trainers to help the kids learn how to use chopsticks for Online Buy Wholesale japanese sauce bowls from China japanese sauce bowl,taylor bowls,custom ceramic bowls,cup soup bowls,,Wholesale Japanese Style Handpainted Ceramic Bowls Under Glazed Tableware Fruit Japanese bowl / mezze bowl / Buffet salad sauce sauce bowl / dish / clover and. 6 Ceramic Baby Bowl – AliExpress.com Find Quality Ceramic Baby Bowl Mother & Kids,Baby Dishes,Home & Garden Cute Bowl Cup Dessert Seasoning Sauce Container Soup Baby Bowl 6-10 ; Material: Ceramic ; Feature: Eco-Friendly LS_Crystal Wholesale Supermarket Japanese Style Hand Cup Baby Ceramic Bowl Under Glazed Tableware Dipping sauce bowl
Etsy Set Of 2, Ceramic Small Bowls In Black and White, Salt and Pepper Bowls, Bowls Set
Soy Sauce Plates
Wooden Dipping Bowls
Dip Cups
Mini Wooden Bowls Modern Dinnerware Set, Sushi Set, Unique Dinner Plates, Dipping Sauce Bowls, Vintage Japanese Bowl Footed Sauce Dish Japan Dipping Bowl Hand Wholesale Ceramic Sauce Dish – DHgate.com 213 items crystal drinking glasses,wholesale ceramic sake bottle cups,character Order: 8 Pieces Sold: 6 Japanese Cherry Blossom Ceramic Sushi Dishes Sushi Dish Set Sushi The ice cold dish sauce dish plate retro ceramic tableware bowl Wholesale-Japanese style and creative ceramic plate disc flat sauce Tableware – Wikipedia Tableware is the dishes or dishware used for setting a table, serving food and dining. A table setting in Western countries is mainly in one of two styles: service 脿 la russe Items of tableware include a variety of plates, bowls; or cups for individual . Japanese ceramic tableware is an industry that is many centuries old. Miya Company – Japanese Tableware and Gifts Our mission is to provide the most unique products made in, or inspired by, Japan for the global market. All Dinnerware
west elm west elm offers a chic selection of dinner plates and modern dinnerware. Give any dinner table an update with these modern dinner plates. Japan Centre – Buy Japanese Authentic Tableware Online Huge range of beautiful Japanese tableware – choose from noodle bowls, miso soup bowls, Ceramic Serving Plate And Soy Sauce Dish Set – Black And Blue, 508 g, 2 items Low Ceramic Rice Bowl Set – Various Patterns, 1.25 Kg, 6 items Ceramic Tall Cup Set – Various Patterns, 785 g, 5 items WHOLESALE · UMAI. Dinnerware – Plates, Bowls & Sets
World Market Brows our affordable Dinnerware Sets, including Plates & Bowls. Nutcracker Ceramic Dinnerware Kid's Christmas Melamine Plates Set of 6 .. your kitchen and dining room with the style of your choice, from bohemian to ultra-modern, Wow your guests by serving small bites and sauces with our sensational square, Asian Dinnerware Sets
World Market You'll love our affordable Asian Dinnerware Sets from around the world. Black and Red Melamine Sauce Dishes Set of 6 Floral Border Serving Bowl Dotted Porcelain Sake Cups, Set of 4 We have an array of styles in wood and ceramic, as well as easy-to-hold trainers to help the kids learn how to use chopsticks for Online Buy Wholesale japanese sauce bowls from China japanese sauce bowl,taylor bowls,custom ceramic bowls,cup soup bowls,,Wholesale Japanese Style Handpainted Ceramic Bowls Under Glazed Tableware Fruit Japanese bowl / mezze bowl / Buffet salad sauce sauce bowl / dish / clover and. 6 Ceramic Baby Bowl – AliExpress.com Find Quality Ceramic Baby Bowl Mother & Kids,Baby Dishes,Home & Garden Cute Bowl Cup Dessert Seasoning Sauce Container Soup Baby Bowl 6-10 ; Material: Ceramic ; Feature: Eco-Friendly LS_Cry
It is not easy to find such a professional and responsible provider in today's time. Hope that we can maintain long-term cooperation.