Factory Price For melamine coffee mug for India Factory
Factory Price For melamine coffee mug for India Factory Detail:
| Specification | |
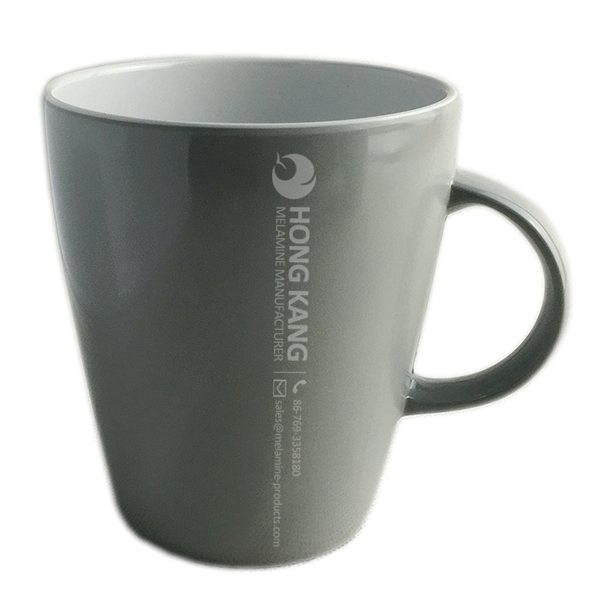
| Item Name | 400ml Melamine Coffee Mug |
| Item No. | CP093 |
| Shape | Round with handle |
| Body Color | Grey/White |
| Decal Color | 4 colors print (if need) |
| Finish | Glossy |
| Style | Fashion |
| Motif Design | Customized |
| Shape Design | OEM/ODM |
| Test Standard | FDA,PROP 65,EN71,LFGB etc. by SGS or ITS |
| Packaging | 80pcs/carton |
| Dimensions | |
| Length | 8.7 cm |
| Width | 11.5 cm |
| Height | 10 cm |
| Capacity | 400 ml |
| Material | |
| Body Material | 100%melamine |
| Decal Material (if need) | 4 colors print (CMYK), or spot color printing, RoHS certificate |
| Imprint (if need) | Seiko ink type 1000 or other type, RoHS certificate |
| Accessories Information | |
| Lid included | No |
| Other | No |
| Weights | |
| Net Weight (kg) | 9 |
| Shipping Weight (kg) | 10.3 |
Product detail pictures:
Related Product Guide:
Top Ten Power Toothbrushes
Choosing The Best Dog Bowl and Feeder for Your Dog
We stick to our enterprise spirit of "Quality, Performance, Innovation and Integrity". We purpose to create a lot more price for our prospects with our rich resources, innovative machinery, experienced workers and great products and services for Factory Price For melamine coffee mug for India Factory, The product will supply to all over the world, such as: Italy , Slovakia , Anguilla , It is our customers' satisfaction over our products and services that always inspires us to do better in this business. We build mutually beneficial relationship with our clients by giving them large selection of premium car parts at marked down prices. We offer wholesale prices on all our quality parts so you are guaranteed greater savings.
FAQ: 1.Q: Where is your factory located? How can I visit there? A: Our factory is located in Guangdong province, China. Warmly welcome to visit us! 2.Q: What is the material of your products? A: The material is melamine. 3.Q: How can I get some samples? A: We can send the samples by Express/DHL/FedEx/UPS etc. 4.Q: How does your company do regarding quality control? A: We have a very strict QC system. Our inspectors have been closely monitoring the production process from the selection of raw materials to the final step of the finished products. 5.Q: Can you print our logo on the product & packing? A: Yes, We can print your logo on our products. 
| * Do Not Touch On Fire Directly | |
|---|---|
| * Do Not Washing By Steelwire Ball | |
| * Non-Microwave Ovens | |
| * Dishwasher Safe |
Dear, Sir / Madam,
We wish to introduce ourselves as the authorized Importer and Distributor for OCEAN GLASSWARE Brand Manufactured in THAILAND. Ocean Glassware range of products includes clear tumblers, Stemware, Pressed ware like plates and bowls, Service accessories and ashtrays. We also have a Wide Range of Gift Sets for Corporate Gifting. We have added a new range of Products under the Brand Name “LUCARIS” Crystal of Modern Asia. K.I. Glassware is pleased to introduce Lucaris Crystal, a High End Premium Crystalline Based Stemware and Tumblers. Lucaris Stemware has been meticulously designed and crafted to the Smallest Details, to ensure the Highest in functionality and Aesthetic Quality and that evoke all Senses, meeting the Demands of Wine lovers and Food Service Professionals. All of these Products are available under a Set of 6 for the Convenience of Gifting and Use at Home.
I would most kindly request you to check our Website www.oceanglass.com and www.lucariscrystal.com .
In case of a Requirement of the following Gift sets or Presentation, Please email us your request at sunil@kiglassindia.com.
Thanking You,
Best Regards,
SUNIL SRIVASTAVA
SALES MANAGER-MT & B2B(INDIA)
K.I.GLASSWARE INDIA PVT.LTD.
17A/41, 2nd Floor,
Opp. Jessaram Hospital,
Gurudwara Road, Karol Bagh,
New Delhi – 110 005
Mob: +918882228344
Email: sunil@kiglassindia.com
Website: www.lucariscrystal.com, www.oceanglass.com
The after-sale warranty service is timely and thoughtful, encounter problems can be resolved very quickly, we feel reliable and secure.