Wholesale Distributors for melamine colander for European Factory
Wholesale Distributors for melamine colander for European Factory Detail:
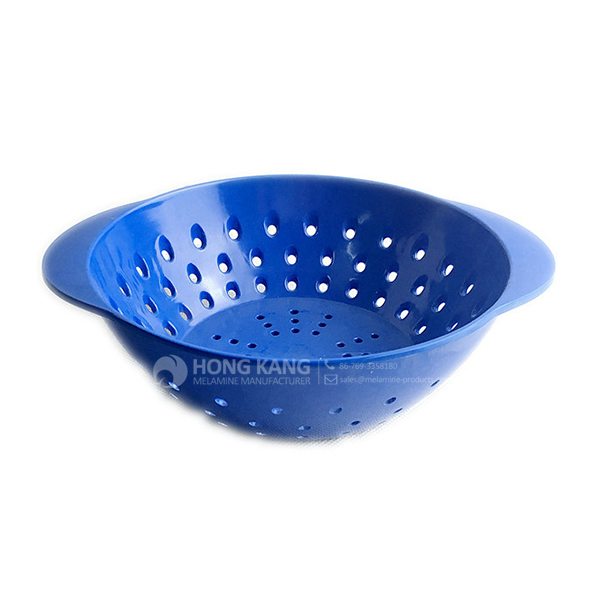
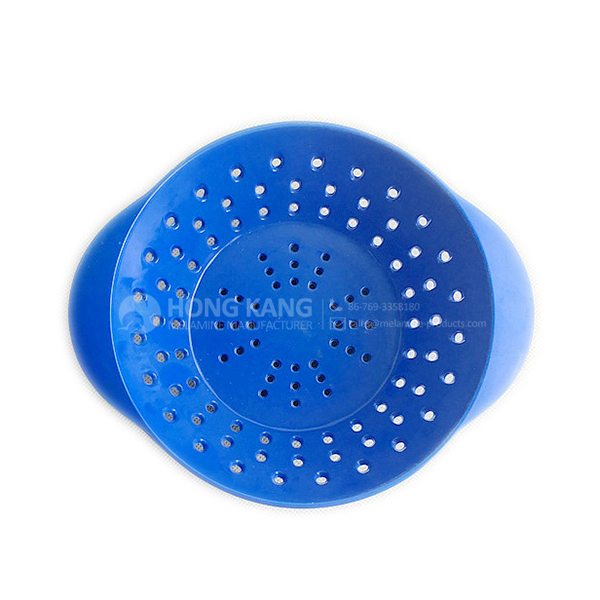
| Specification | |
| Item Name | 6inch Round Melamine Colander |
| Item No. | BW257 |
| Shape | Round with handle |
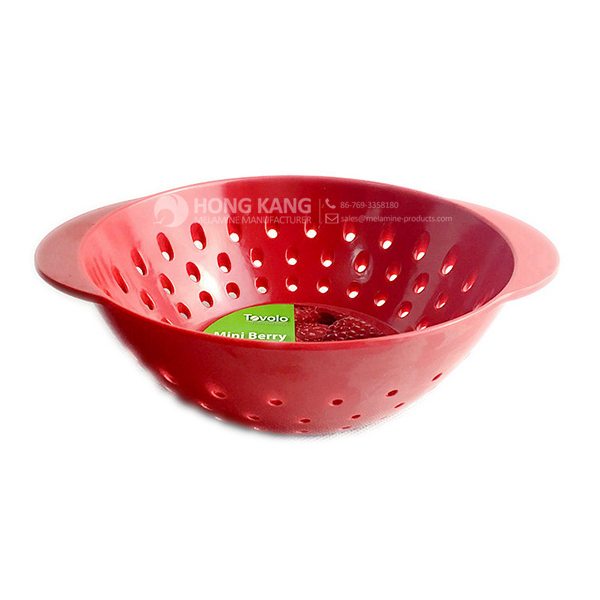
| Body Color | Blue/Red |
| Decal Color | 4 colors print (if need) |
| Finish | Glossy |
| Style | Fashion |
| Motif Design | Customized |
| Shape Design | OEM/ODM |
| Test Standard | FDA,PROP 65,EN71,LFGB etc. by SGS or ITS |
| Packaging | 12pcs/box,72pcs/carton |
| Dimensions | |
| Length | 15.3 cm |
| Width | 18.3 cm |
| Height | 5.3 cm |
| Capacity | N/A |
| Material | |
| Body Material | 100%melamine |
| Decal Material (if need) | 4 colors print (CMYK), or spot color printing, RoHS certificate |
| Imprint (if need) | Seiko ink type 1000 or other type, RoHS certificate |
| Accessories Information | |
| Lid included | No |
| Other | No |
| Weights | |
| Net Weight (kg) | 9.5 |
| Shipping Weight (kg) | 10.8 |
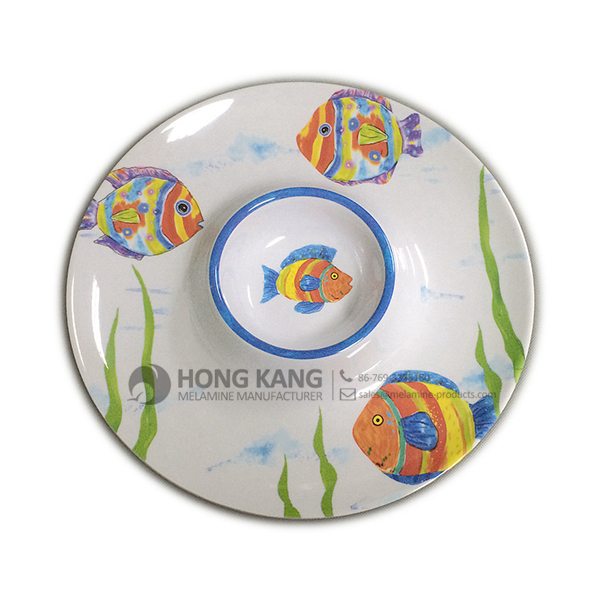
Product detail pictures:
Related Product Guide:
Benefits of Melamine Dinnerware
Choosing The Best Dog Bowl and Feeder for Your Dog
Our well-equipped facilities and great excellent command throughout all stages of generation enables us to guarantee total customer fulfillment for Wholesale Distributors for melamine colander for European Factory, The product will supply to all over the world, such as: Morocco , Sri Lanka , Serbia , Our products are very popular in the word, like South American, Africa, Asia and so on. Companies to "create first-class products" as the goal, and strive to deliver customers with high quality solutions, present high-quality after-sales service and technical support, and customer mutual benefit, create a better career and future!
FAQ: 1.Q: Where is your factory located? How can I visit there? A: Our factory is located in Guangdong province, China. Warmly welcome to visit us! 2.Q: What is the material of your products? A: The material is melamine. 3.Q: How can I get some samples? A: We can send the samples by Express/DHL/FedEx/UPS etc. 4.Q: How does your company do regarding quality control? A: We have a very strict QC system. Our inspectors have been closely monitoring the production process from the selection of raw materials to the final step of the finished products. 5.Q: Can you print our logo on the product & packing? A: Yes, We can print your logo on our products. 
| * Do Not Touch On Fire Directly | |
|---|---|
| * Do Not Washing By Steelwire Ball | |
| * Non-Microwave Ovens | |
| * Dishwasher Safe |
How To Make Concrete Planters | DIY Build Cement Containers http://blackthumbgardener.com In this video I walk you through building your own concrete planters. I start with a quick little intro about what we’ll be doing and then go into the supplies you will need. After talking about the supplies you’ll need for the cement containers I talk a little bit about the math I used to figure out how much concrete I will use to make my planters. You’ll watch as I fill my plastic containers with the cement and mix in the water. Once the concrete was mixed thoroughly I pressed my second container into the first container to create the cavity in the planter. I also show how I cured the concrete planter.
I suggest subscribing to my channel to get updates when I show you how to stain and dye these concrete planters.
In China, we have many partners, this company is the most satisfying to us, reliable quality and good credit, it is worth appreciation.