Professional China melamine soap dish to Oman Importers
Professional China melamine soap dish to Oman Importers Detail:
| Specification | |
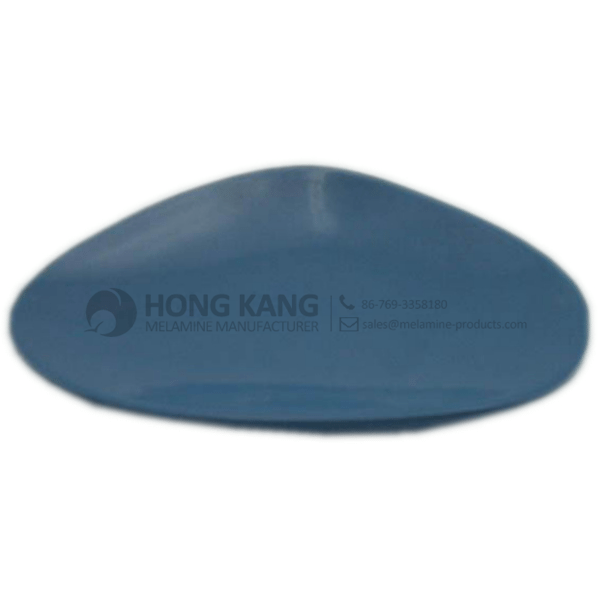
| Item Name | 5.5inch Triangle Melamine soap dish |
| Item No. | PT223 |
| Shape | Triangle |
| Body Color | Blue |
| Decal Color | 4 colors print (if need) |
| Finish | Glossy |
| Style | Fashion |
| Motif Design | Customized |
| Shape Design | OEM/ODM |
| Test Standard | FDA,PROP 65,EN71,LFGB etc. by SGS or ITS |
| Packaging | 12pcs/box,72pcs/carton |
| Dimensions | |
| Length | 14 cm |
| Width | 10 cm |
| Height | 1.5 cm |
| Capacity | N/A |
| Material | |
| Body Material | 100%melamine |
| Decal Material (if need) | 4 colors print (CMYK), or spot color printing, RoHS certificate |
| Imprint (if need) | Seiko ink type 1000 or other type, RoHS certificate |
| Accessories Information | |
| Lid included | No |
| Other | No |
| Weights | |
| Net Weight (kg) | 6.4 |
| Shipping Weight (kg) | 7.5 |
Product detail pictures:
Related Product Guide:
Choosing The Best Dog Bowl and Feeder for Your Dog
The Benefits Of Using Silicone Kitchen Utensils
We also offer product sourcing and flight consolidation services. We have our own factory and sourcing office. We can provide you with almost every type of product related to our product range for Professional China melamine soap dish to Oman Importers, The product will supply to all over the world, such as: Malta , Madras , United Arab Emirates , As a way to make use of the resource on the expanding information and facts in international trade, we welcome prospects from everywhere on the web and offline. In spite in the top quality products and solutions we supply, effective and satisfying consultation service is supplied by our professional after-sale service group. Solution lists and thorough parameters and any other info weil be sent for you timely for the inquiries. So make sure you get in touch with us by sending us emails or contact us if you have any concerns about our firm. ou can also get our address info from our web site and come to our enterprise. or a field survey of our solutions. We're confident that we have been going to share mutual results and build solid co-operation relations with our companions in this market. We're looking forward to your inquiries.
FAQ: 1.Q: Where is your factory located? How can I visit there? A: Our factory is located in Guangdong province, China. Warmly welcome to visit us! 2.Q: What is the material of your products? A: The material is melamine. 3.Q: How can I get some samples? A: We can send the samples by Express/DHL/FedEx/UPS etc. 4.Q: How does your company do regarding quality control? A: We have a very strict QC system. Our inspectors have been closely monitoring the production process from the selection of raw materials to the final step of the finished products. 5.Q: Can you print our logo on the product & packing? A: Yes, We can print your logo on our products. 
| * Do Not Touch On Fire Directly | |
|---|---|
| * Do Not Washing By Steelwire Ball | |
| * Non-Microwave Ovens | |
| * Dishwasher Safe |
With our easy Test Kitchen tip, you’ll never have to worry about broken glass again.
Watch more Super Quick Video Tips at
http://AmericasTestKitchenFeed.com
America’s Test Kitchen is a real 2,500 square foot test kitchen located just outside of Boston that is home to more than three dozen full-time cooks and product testers. Our mission is simple: to develop the absolute best recipes for all of your favorite foods. To do this, we test each recipe 30, 40, sometimes as many as 70 times, until we arrive at the combination of ingredients, technique, temperature, cooking time, and equipment that yields the best, most-foolproof recipe.
Each week, the cast of America’s Test Kitchen brings the recipes, testings, and tastings from Cook’s Illustrated magazine to life on our public television series. With more than 2 million viewers per episode, we are the most-watched cooking show on public television.
http://www.americastestkitchen.com
More than 1.3 million home cooks rely on Cook’s Illustrated and Cook’s Country magazines to provide trusted recipes that work, honest ratings of equipment and supermarket ingredients, and kitchen tips.
http://www.cooksillustrated.com
http://www.cookscountry.com
Follow us:
Twitter: http://www.twitter.com/testkitchen
Facebook: http://www.facebook.com/americastestkitchen
Dear, Sir / Madam,
We wish to introduce ourselves as the authorized Importer and Distributor for OCEAN GLASSWARE Brand Manufactured in THAILAND. Ocean Glassware range of products includes clear tumblers, Stemware, Pressed ware like plates and bowls, Service accessories and ashtrays. We also have a Wide Range of Gift Sets for Corporate Gifting. We have added a new range of Products under the Brand Name “LUCARIS” Crystal of Modern Asia. K.I. Glassware is pleased to introduce Lucaris Crystal, a High End Premium Crystalline Based Stemware and Tumblers. Lucaris Stemware has been meticulously designed and crafted to the Smallest Details, to ensure the Highest in functionality and Aesthetic Quality and that evoke all Senses, meeting the Demands of Wine lovers and Food Service Professionals. All of these Products are available under a Set of 6 for the Convenience of Gifting and Use at Home.
I would most kindly request you to check our Website www.oceanglass.com and www.lucariscrystal.com .
In case of a Requirement of the following Gift sets or Presentation, Please email us your request at sunil@kiglassindia.com.
Thanking You,
Best Regards,
SUNIL SRIVASTAVA
SALES MANAGER-MT & B2B(INDIA)
K.I.GLASSWARE INDIA PVT.LTD.
17A/41, 2nd Floor,
Opp. Jessaram Hospital,
Gurudwara Road, Karol Bagh,
New Delhi – 110 005
Mob: +918882228344
Email: sunil@kiglassindia.com
Website: www.lucariscrystal.com, www.oceanglass.com
Although we are a small company, we are also respected. Reliable quality, sincere service and good credit, we are honored to be able to work with you!