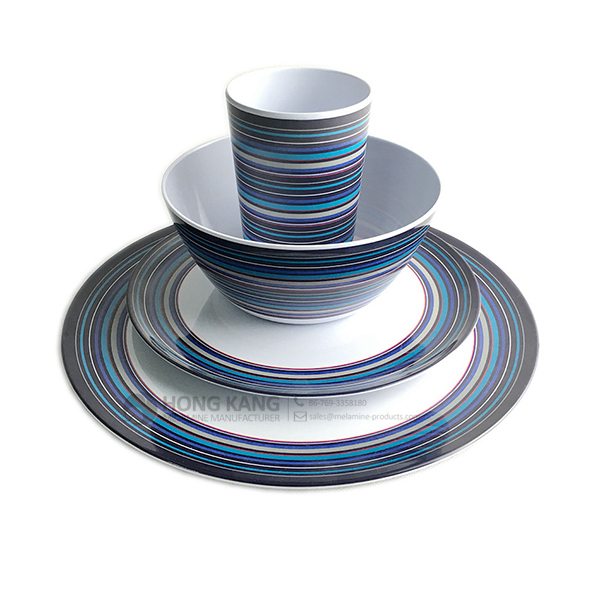
• OEM Supplier for melamine kids mug Wholesale to Saudi Arabia

    Product Detail

    Features

    Care Instructions

    Product Tags

    Related Video

    Feedback (2)

    To continually enhance the management technique by virtue of your rule of "sincerely, great faith and high-quality are the base of company development", we widely absorb the essence of similar merchandise internationally, and continuously build new merchandise to meet the demands of customers for buy melamine tumblers , small melamine colander , melamine bowl , we could solve our customer problems asap and do the profit for our customer. If you need good service and quality , pls choose us , thanks !
    OEM Supplier for melamine kids mug Wholesale to Saudi Arabia Detail:

    Specification
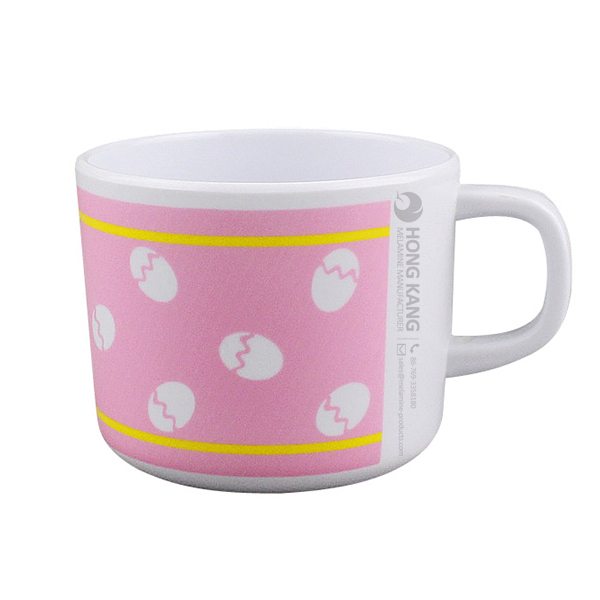
    Item Name 150ml Melamine Kids Mug
    Item No. CP011
    Shape Round with handle
    Body Color White
    Decal Color 4 colors print (if need)
    Finish Glossy
    Style Fashion
    Motif Design Customized
    Shape Design OEM/ODM
    Test Standard FDA,PROP 65,EN71,LFGB etc. by SGS or ITS
    Packaging 100pcs/carton
    Dimensions
    Length 7.8 cm
    Width 10.2 cm
    Height 6.5 cm
    Capacity 150 ml
    Material
    Body Material 100%melamine
    Decal Material (if need) 4 colors print (CMYK), or spot color printing, RoHS certificate
    Imprint (if need) Seiko ink type 1000 or other type, RoHS certificate
    Accessories Information
    Lid included No
    Other No
    Weights
    Net Weight (kg) 6
    Shipping Weight (kg) 7.2

    Product detail pictures:

    OEM Supplier for
 melamine kids mug Wholesale to Saudi Arabia detail pictures

    OEM Supplier for
 melamine kids mug Wholesale to Saudi Arabia detail pictures

    OEM Supplier for
 melamine kids mug Wholesale to Saudi Arabia detail pictures

    OEM Supplier for
 melamine kids mug Wholesale to Saudi Arabia detail pictures


    Related Product Guide:
    Benefits of Melamine Dinnerware
    Choosing The Best Dog Bowl and Feeder for Your Dog

    With this motto in mind, we've turn into one of quite possibly the most technologically innovative, cost-efficient, and price-competitive manufacturers for OEM Supplier for melamine kids mug Wholesale to Saudi Arabia, The product will supply to all over the world, such as: Greece , French , Pretoria , Our staffs are rich in experience and trained strictly, with professional knowledge, with energy and always respect their customers as the No. 1, and promise to do their best to provide the effective and individual service for customers. The Company pays attention to maintaining and developing the long-term cooperation relationship with the customers. We promise, as your ideal partner, we will develop a bright future and enjoy the satisfying fruit together with you, with persisting zeal, endless energy and forward spirit.

    FAQ: 1.Q: Where is your factory located? How can I visit there? A: Our factory is located in Guangdong province, China. Warmly welcome to visit us! 2.Q: What is the material of your products? A: The material is melamine.  3.Q: How can I get some samples? A: We can send the samples by Express/DHL/FedEx/UPS etc. 4.Q: How does your company do regarding quality control? A: We have a very strict QC system. Our inspectors have been closely monitoring the production process from the selection of raw materials to the final step of the finished products. 5.Q: Can you print our logo on the product & packing? A: Yes, We can print your logo on our products. Multicolor-Plastic-Dinnerware-Melamine-Dinner-Plate
    * Do Not Touch On Fire Directly
    * Do Not Washing By Steelwire Ball
    * Non-Microwave Ovens
    * Dishwasher Safe


  • Advertisement ➤ FOR US HOMEOWNERS GO HERE: https://goo.gl/pxGWiw – To find out how Mellisa from California saved Over $100,332.86 In Home repairs expenses last year using a secret loophole until now. Never pay out of pocket for home repairs expenses again!

    ➤ click here to learn about how to potentially save thousands of dollars from unexpected home repairs: https://goo.gl/pxGWiw

    ➤ For The First Time, Mellisa from California Finally Revealed My Secret Loophole To The World On The Next Page…
    ➤ Here https://goo.gl/pxGWiw
    end of advertisement:

    For this DIY concrete planter project Ben shows how to add an automatic irrigation system made out of a wine bottle and scrap wood. Unlike our previous concrete projects the form work for this planter is made from solid wood coated in wax. We wanted to experiment with ways to make reusable forms that are more durable than the laminate and melamine boards we have used in the past.

    Follow us on Instagram to see what we’re working on next!
    Ben: http://instagram.com/benjaminuyeda
    Jessie: http://instagram.com/ijessup


    Click here to SUBSCRIBE to the official This Old House YouTube channel: http://www.youtube.com/subscription_center?add_user=thisoldhouse

    This Old House general contractor Tom Silva transforms stock shelving into a custom built-in. (See below for a shopping list, tools, and steps.)

    Shopping List for Building a Custom Built-In Using Stock Shelving:
    - Freestanding shelving units
    - 1 1/4-inch decking screws, to fasten cabinets together
    - 3-inch drywall screws,”] to attach 2×4 nailer
    - Wood shims,”] to plumb the cabinets
    - Wood glue
    - Construction adhesive
    - 1x8s and 1x6s,”] to cut face frame, fascia, and other trim
    - 2x4s, to make nailer
    - Crown molding
    - Acrylic latex paint (semigloss)

    Tools List for Building a Custom Built-In Using Stock Shelving:
    - Utility knife, to cut through old paint and caulk
    - Two flat bars, to pry molding from wall
    - Oscillating multitool with plunge-cut wood blade, to cut through baseboard
    - Spring clamps
    - Impact driver
    - Screwdriver
    - 4-foot level
    - Stud finder, to locate the wall studs
    - Pin nailer and 3/4-inch pins, to attach trim
    - Finishing nailer and 1 3/4-inch nails, to attach face frame and trim
    - Air compressor, to power pin and finishing nailers
    - Scriber tool, to scribe the face frame to fit against wall
    - Circular saw, to trim scribed face frame parts
    - Caulking gun, for construction adhesive, to adhere shelves
    - Sash brush

    Steps or Building a Custom Built-In Using Stock Shelving:
    1. Use a utility knife to slice through the existing paint and caulk along the top and bottom edges of the baseboard.
    2. Carefully pry the baseboard from the wall with two flat pry bars.
    3. Saw through the baseboard with the oscillating multitool fitted with a plunge-cut wood blade.
    4. Clamp and screw together two cabinets using the impact driver and 1 1/4-inch decking screws.
    5. Set the extension-shelf units on top of the two cabinets, and secure them with the provided cam-screw fasteners.
    6. Measure and mark the stud locations on the wall, then set the cabinet assembly against the wall.
    7. Insert wood shims under the front of the cabinet and check for plumb with the 4-foot level.
    8. Fasten the cabinet bydriving screws through the cabinet back and into the wall studs. Repeat to install the other cabinet.
    9. Glue and nail 1/8-inch-thick pine filler strips (ripped from your 1x stock) to the upper edge of the cabinet. Secure the strips with glue and the pin nailer equipped with 3/4-inch pins.
    10. Screw a 2×4 nailer to the ceiling directly above the cabinets.
    11. Cut a fascia from pine 1x8s to fit along the top of the cabinet. Nail the fascia to the cabinet and to the 2×4 nailer attached to the ceiling.
    12. Install crown molding along the ceiling and across the newly installed cabinets.
    13. Nail the new baseboard across the base of the cabinets.
    14. Build a pine-frame toekick to fill the space between two cabinets. Then cut a shelf to fit on top of the toekick. Adhere the shelf with construction adhesive only.
    15. Build and install a second pine frame and shelf to create a storage nook between the two cabinets.
    16. Scribe the 1×6 pine face frame to fit between the wall and cabinet. Bevel-cut the board along the scribed line with a circular saw.
    17. Nail the scribed face frame to the cabinets.
    18. Cut and install the remaining face frames to the cabinets.
    19. Finish the cabinets with a coat of semigloss acrylic latex paint.

    Follow This Old House and Ask This Old House:
    Facebook: https://www.facebook.com/ThisOldHouse
    Twitter: https://twitter.com/thisoldhouse

    https://twitter.com/asktoh

    Pinterest: http://www.pinterest.com/thisoldhouse/
    G+: https://plus.google.com/+thisoldhouse/posts
    Instagram: http://instagram.com/thisoldhouse
    Tumblr: http://thisoldhouse.tumblr.com/

    This is the first business after our company establish, products and services are very satisfying, we have a good start, we hope to cooperate continuous in the future!
    5 Stars By Julie from Ghana - 2015.12.30 10:21
    A nice supplier in this industry, after a detail and careful discussion, we reached a consensus agreement. Hope that we cooperate smoothly.
    5 Stars By Karl from Jamaica - 2016.06.22 12:49

    Related Products

    WhatsApp Online Chat !